
Enabling Spell Checker and Corrections in Scope Documents
Learn how to use browser-based spell checking within scope documents to identify and correct spelling errors while editing. This guide covers how spell check works across different browsers (Edge, Chrome, and Firefox) and how to apply it directly within your document for accurate and professional content.
- Go to the Bid Packages workspace.
- Click Projects from the left navigation.
The Project Dashboard opens. - Select your project and click any document.
The document preview opens. - Open the document and ensure it is in Editing mode.
- Double-click the line item you want to edit,
or click the line item and select Edit from the action menu.
The line item enters editing mode. - Right-click inside the line item text.
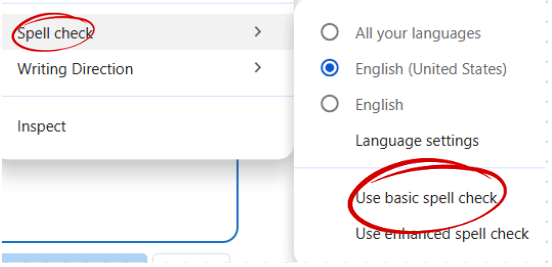
- Hover over Spell Check and click Use Basic Spell Check as shown in the image above.
On macOS, the menu may include ‘Language Settings.’ Clicking it will display the Spell Check section.
Spell checking is now enabled for your document.
Identify and Correct Spelling Errors
- Start typing or review the content.
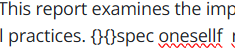
- Misspelled words will appear with a red underline just like image above.
- To correct a word:
- Right-click the underlined word.
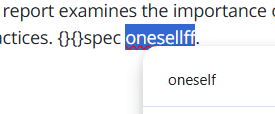
- Select the correct spelling from the suggestions as shown in the image above.
- Right-click the underlined word.
- Click Save to apply the correction.
The updated text is saved with the corrected spelling.
- Go to the Bid Packages workspace.
- Click Projects from the left navigation.
The Project Dashboard opens. - Select your project and click the document where you want to apply spell check.
The document preview opens. - Open the document and ensure it is in Editing mode.
- Double-click the line item you want to edit,
or click the line item and select Edit from the action menu.
The line item enters editing mode. - Right-click inside the line item text.
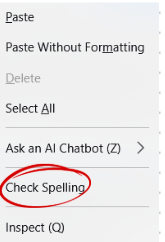
- Click Check Spelling as shown in the image above.
Spell checking is now enabled for your document.
Identify and Correct Spelling Errors
- Start typing or review the content.
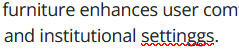
- Misspelled words will appear with a red underline just like image above.
- To correct a word:
- Right-click the underlined word.
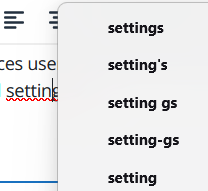
- Select the correct spelling from the suggestions as shown in the image above.
- Right-click the underlined word.
- Click Save to apply the correction.
The updated text is saved with the corrected spelling.
- Open Microsoft Edge.
- Click the three-dot menu (⋯) in the top-right corner.
- Select Settings.
- From the left menu, click Languages.
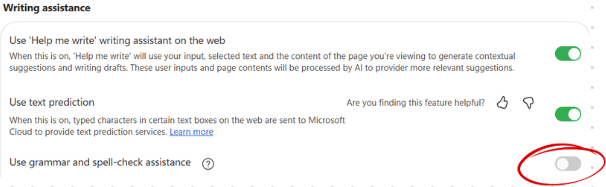
- Under Writing assistance, turn ON Use grammar and spell-check assistance as shown in the image above.
Spell check is now enabled in your browser.
Identify and Correct Spelling Errors in the Document
- Go to the Bid Packages workspace.
- Click Projects from the left navigation.
The Project Dashboard opens. - Select your project and open the document.
The document preview opens. - Open the document and ensure it is in Editing mode.
- Start typing or review the content.
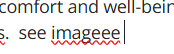
- Misspelled words will appear with a red underline as shown in the image above.
- Right click the underlined word.
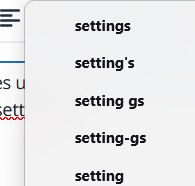
- Select the correct spelling from the suggestions as shown in the image above.
The correct word will be applied immediately. - Click Save to apply the changes.
⚠️ Note
- Spell check works only when the line item is in Editing mode, so make sure you enable edit before checking spelling.
BP-078